Sighting In An A2 - Briefly
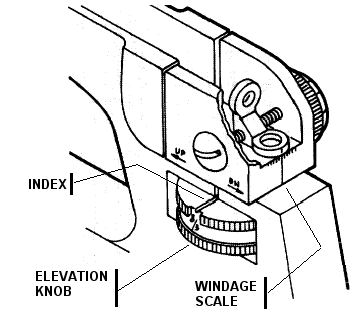
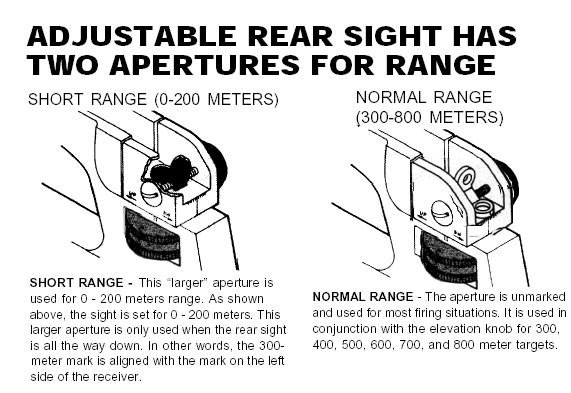
| The AR-15 rifle has two adjustable sights- front and rear. Zeroing elevation adjustments are made using the front sight, and windage adjustments with the rear. | The rear sight has an elevation knob with range indicators from 300 to 800 meters and two apertures for range. One aperture is marked 0-2 for short range from 0-200 meters and the unmarked aperture for normal range from 300 to 800 meters. This unmarked aperture is used in conjunction with the elevation knob for 300-800 meter targets. |
|
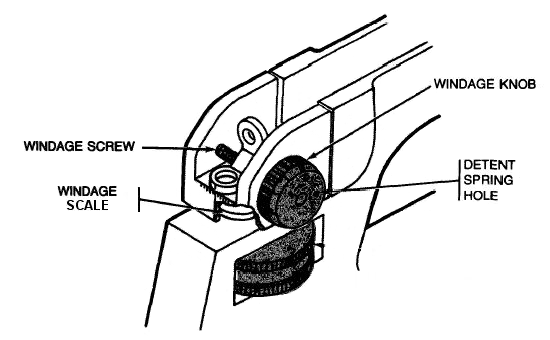
| The rear sight also consists of a windage knob on the right side of the sight. Each click of the windage knob will move the strike of the round from 1/8 inch at 25 meters to 4 inches at 800 meters. A windage knob pointer is on the windage knob. |
|
|
| The front sight consists of a rotating sight post with a spring loaded detent. This detent can be depressed using a sight adjustment tool, or using a sharp point such as a cartridge tip. |
|
|
|
|
Establishing a Battlesight Zero
Establish Mechanical Zero -
Carefully aim and fire each shot of a 3-shot group at a paper target set up at 25 (or 42) meters. If your shots are not striking the point-of-aim, then adjust your sights.
Repeat the fire and adjust sequence until you find that you have tight groups around your point of aim. When you have successfully completed these procedures, your rifle will be combat-zeroed. Once zeroed, all other range markings on the elevation knob will likewise be zeroed. |
|
|